How to Make A Scene
Have fun and remember art is not perfect — it is real, it is messy, and you are about to create a true one-of-a-kind piece!
Each piece of art comes with creative images from which to choose. Make A Scene all your own or gather others and create a piece together!
Step 1: Choose an image to paint


Step 2: Pick how you’ll paint.
Trace and Paint: Easily trace an image provided (or one you create) onto the artwork and paint it in. This is the method we suggest.
Draw and Paint: Using pencil, draw an image directly onto the art. (You are not able to erase and edit with this option).
Just Paint: Using the art markers, paint the images freely without any sketching to prep yourself. This can be done with any image you find easy to draw such as stars in the night sky, ants walking through the grass, clouds in the sky…
Step 3: Now it’s time to create!
Blend colors and create texture.
Instructions
MARKERS: Before you begin your painting, "start" all of the markers per the instructions below:
Shake the paint marker (10 seconds)
Remove one of the marker's ends
Using your hand, with the open end facing the ceiling (up), press the tip down to release the air.
With the marker tip on a piece of sketch paper (kit item #6), press the tip several times vertically until the paint makes a mark.
Secure the lid tightly after each use.
Note: If the marker mixes with another marker color while painting, clean the marker tip as best you can on a piece of sketch paper before replacing the lid. Do not use water to clean. Remove as much as possible with small strokes.
TISSUE PAPER: Lay out the tissue paper as a workspace to create your art.
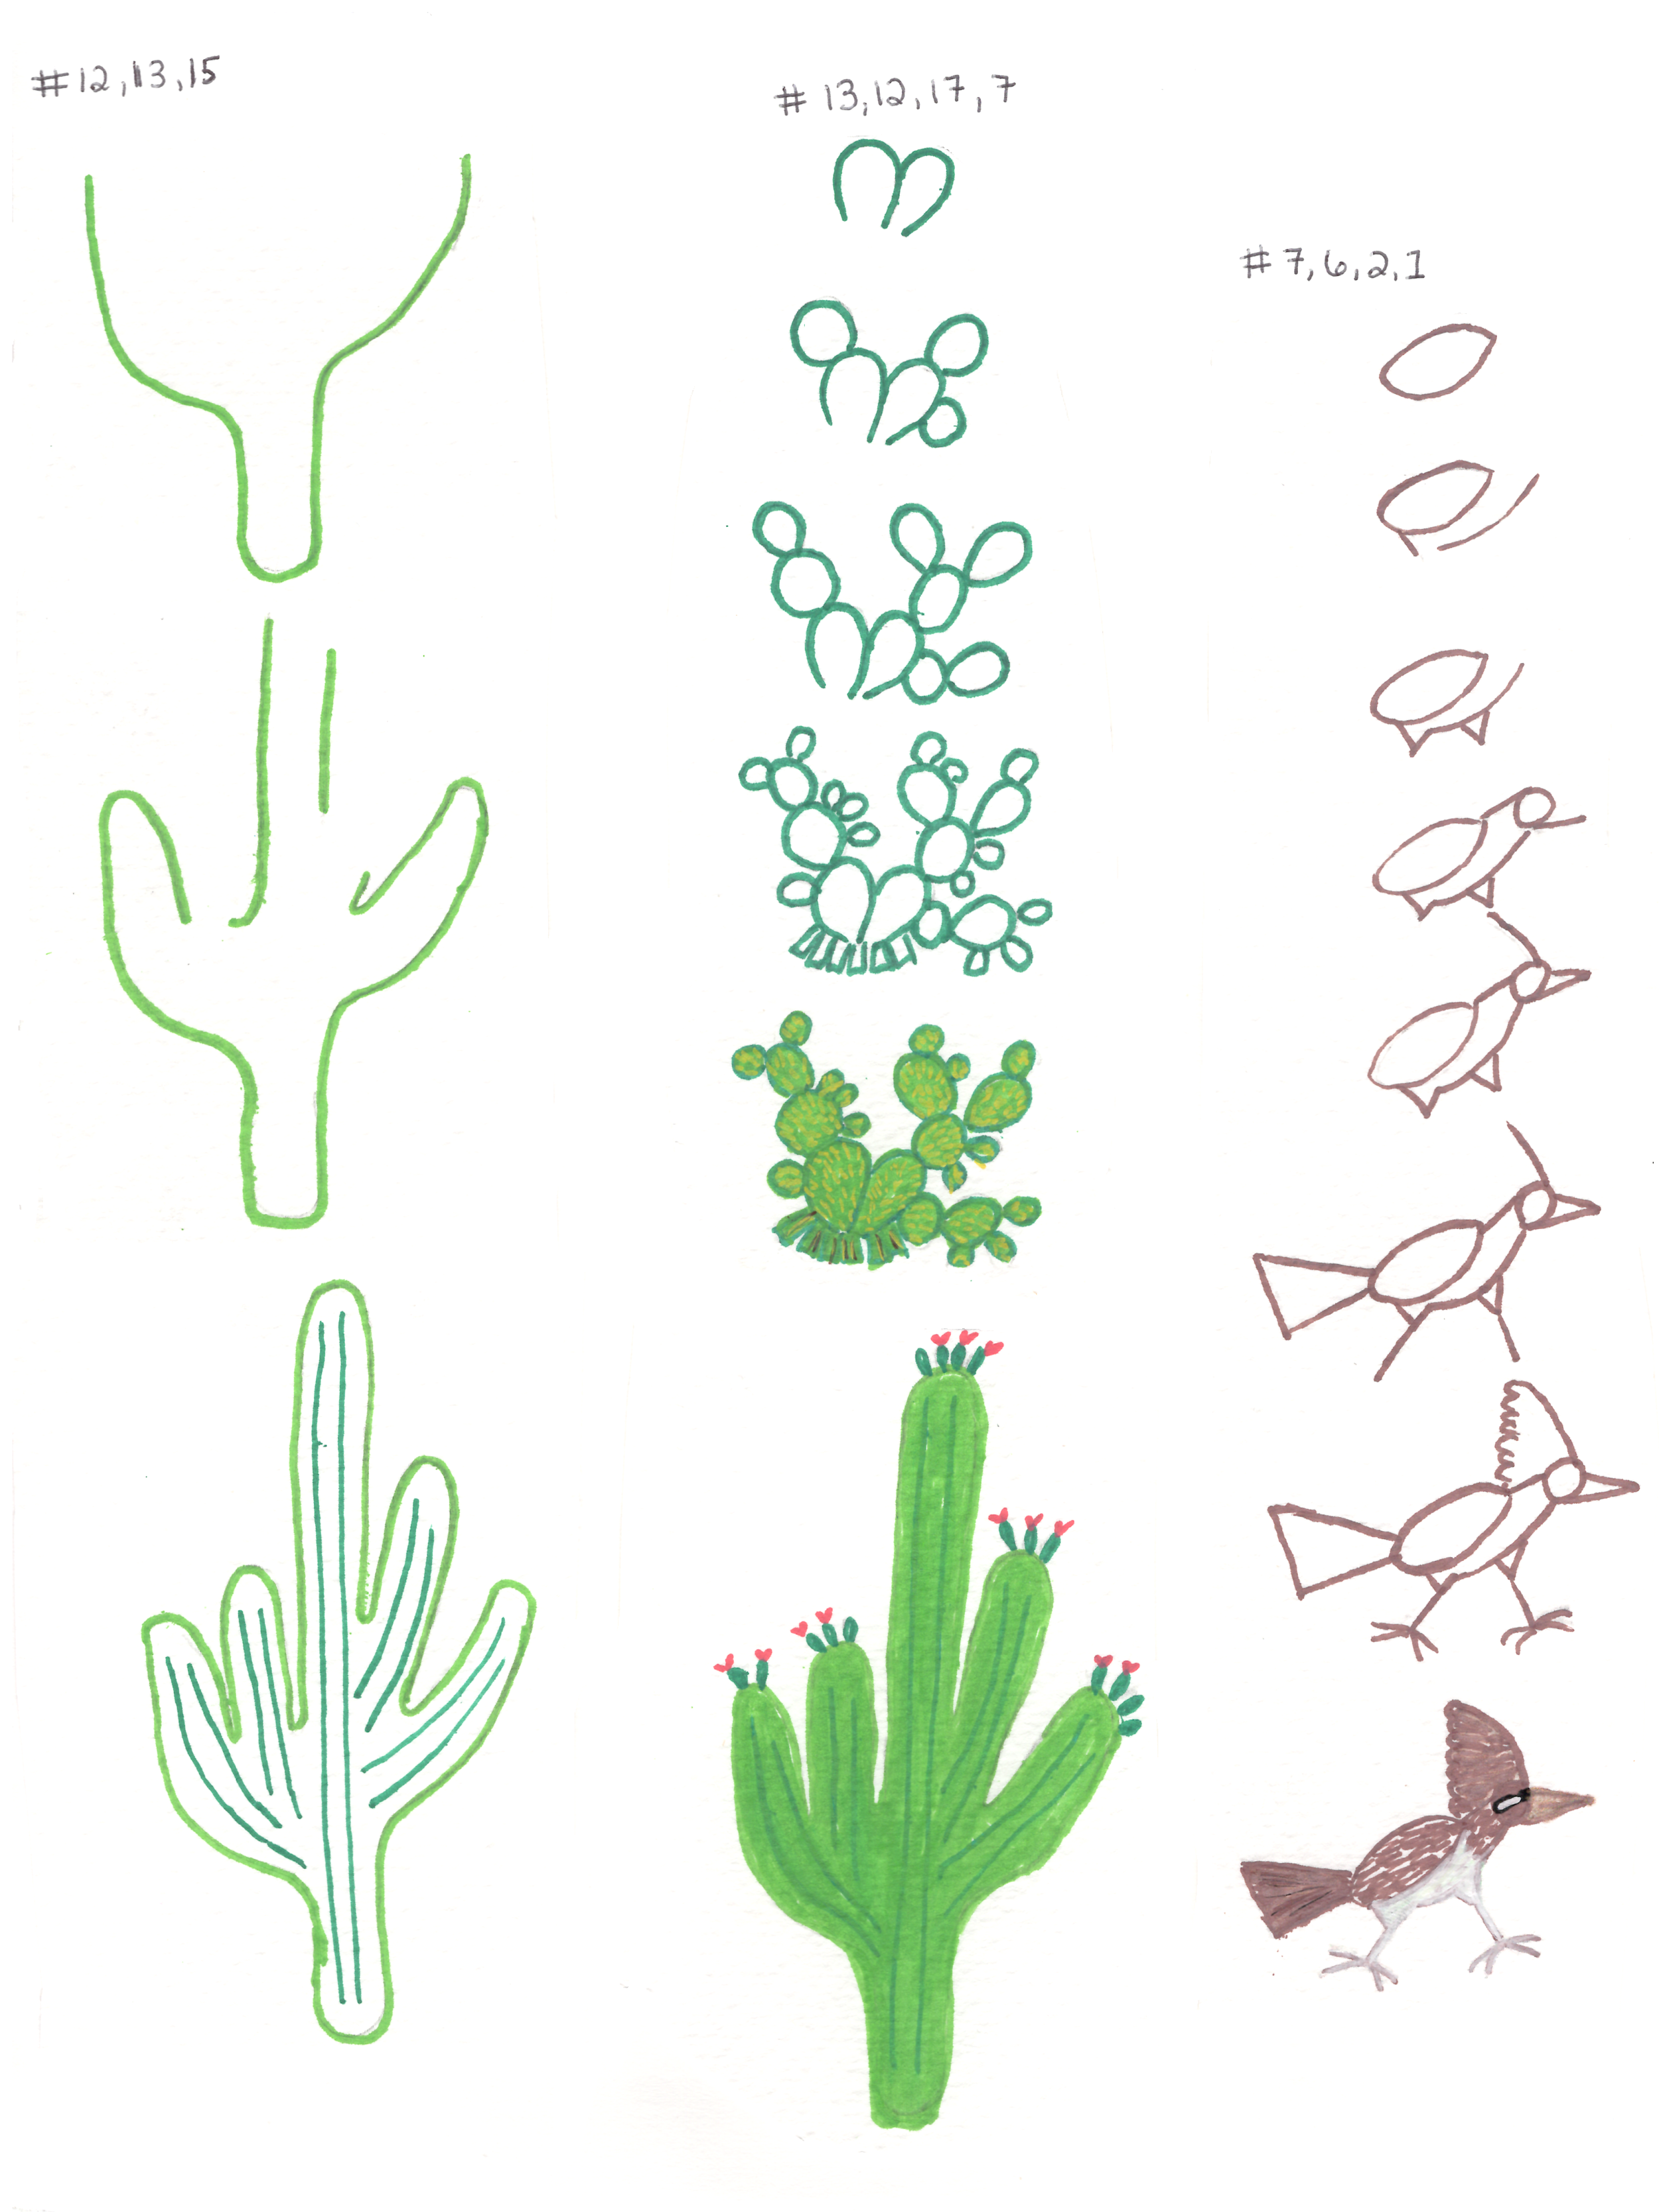
STEP BY STEPS: Choose an image and decide how you'll paint it. Our quick tutorial videos guide you through the 3 main painting techniques
“Trace and Paint” steps without the video:
Using a piece of tracing paper (kit item #7), trace the image you'll be creating.
Flip the traced image over and trace the backside.
Place the backside onto the art where you will be creating. Holding the paper very still, scribble completely over the image with a pencil.
Lift the trace paper off without rubbing it on the art.
Using markers, paint over the pencil outline. Marker #4 or #1 are recommended to draw the outline of your image as it can be painted over or thinned out by other paint markers.
ARTIST TIPS
Painting a solid/single color image: We recommend tracing with the #4 marker however you may also trace with the color you are using to paint your image.
To Blend paint: While the paint is still wet, paint one color on top of the other. The wide end is better for mixing color and the slim end better for blending (so both colors show a bit).
To layer/cover: Allow a few minutes for paint to dry. Paint over the dried paint. Repeat as necessary.
Make a color lighter: Paint desired area with Marker #2. While it's still wet, paint on top of the white (#2) with the color you wish to lighten. Repeat as necessary.
Make a color show up darker/bolder: Allow the coat to dry then apply more layers as needed drying between each application.
Smudge or spill some paint? You can either leave it as is or create an image to go over it.
Erasing: You cannot erase on the artwork. You can paint over the pencil with as many layers needed to completely cover it.
HOSTING: If you are creating this masterpiece with a small group, here are a few tips:
Start the markers before the group arrives.
Lay out all supplies in two stations. This will allow two people to work on the art at once saving some time.
Station 1: Sketch paper, tracing paper and 1 pencil to prepare an image for the painting
Station 2: 1 pencil and markers for painting onto the artwork.
Prepare your guests via your event invitation or at the beginning of your party by sharing our site www.handstoheartgifts.com or the QR code. This will allow them to view tutorials and the images they can paint before they begin.
Provide a tablet (or other device) displaying the website tutorials to help and inspire your artist group. This is not necessary as the guests can scan the QR codes on their phones.
Autograph Sheet: Leave this for each guest to fill out with their name and notes on what they have painted. The person keeping the art may place this behind the artwork as a keepsake of what was created together.
Timeframe: Each image painted takes an average of 15 to 20 minutes from start (trace or sketch) to finish (painting). Depending upon how many guests participate, the artwork takes anywhere from 2 to 3 hours to complete with one to two people creating at a time. This activity is a delightful addition to any event, offering guests the chance to mingle as they take turns creating. It does not require each guest to participate. It’s an excellent, optional activity that provides the guest of honor with an exceptional keepsake.
CREATING WITH KIDS
Direct the kids to trace the back side of their image with pencil.
An adult should transfer the image onto the artwork (refer to the "Trace and Paint" tutorial in our tutorials section).
An adult—or the children, if they're confident (since you cannot erase and correct on the artwork)—will trace over the pencil outline with marker #4.
It’s time to paint! The children can pick their own colors or follow the suggested marker numbers in the step-by-steps.
You can paint the art in sessions. Create them as weekend projects together. The supplies are easy to pack and unpack and you’ll love your creation together.
CREATING AS THE SOLO ARTIST.
You have the privilege of painting at your leisure. Paint a couple a day over multiple sessions or the entire piece in one session.